How to Remove Cement Residue From Newly Installed Tiles
Newly installed tiles can look dull, cloudy or dirty because of cement residue left behind during installation. Even after the tiling work is complete, small amounts of cement, adhesive or grout can remain on the tile surface. If these materials are not cleaned correctly, they can leave stubborn marks that affect the overall appearance of the finished floor or wall.
Removing cement residue from newly installed tiles requires the right cleaning method, suitable tools and careful handling. Using harsh chemicals or abrasive equipment without checking the tile type can damage the surface, scratch the finish or affect the grout between tiles.
The good news is that most cement residue can be removed with appropriate cleaning techniques. The correct approach depends on whether the residue is fresh, partially hardened or fully cured.
In this guide, we explain how to remove cement residue from tiles, which cleaning products to use, common mistakes to avoid and how to keep newly installed tiles looking clean.
What Causes Cement Residue on Newly Installed Tiles?
Cement residue is commonly left behind during tile installation, grouting and other finishing activities.
When tiles are being installed, cement-based adhesive and grout are used to secure the tiles and fill the joints. During these processes, some material may spread across the tile surface.
If the excess material is not removed at the correct time, it can dry and form a thin layer over the tiles.
This layer is often called cement haze or grout haze.
Common causes include:
- Excess cement-based adhesive spreading onto tile surfaces.
- Grout being applied without removing excess material.
- Delayed cleaning after installation.
- Incorrect cleaning techniques during grouting.
- Cement splashes from nearby construction activities.
- Using too much water during the initial cleaning process.
Cement residue is particularly noticeable on darker tiles, polished surfaces and tiles with a smooth finish.
1. Identify the Type of Cement Residue
Before cleaning newly installed tiles, identify what kind of residue you are dealing with.
Different materials require different cleaning methods. Applying the wrong product may make the problem worse.
Fresh Cement Residue
Fresh cement residue has not completely hardened. It may appear as wet marks, small splashes or a thin layer of cement-based material.
This type of residue is generally easier to remove because it has not fully bonded to the tile surface.
A damp sponge and clean water may be sufficient for removing small amounts of fresh residue.
Dried Cement Haze
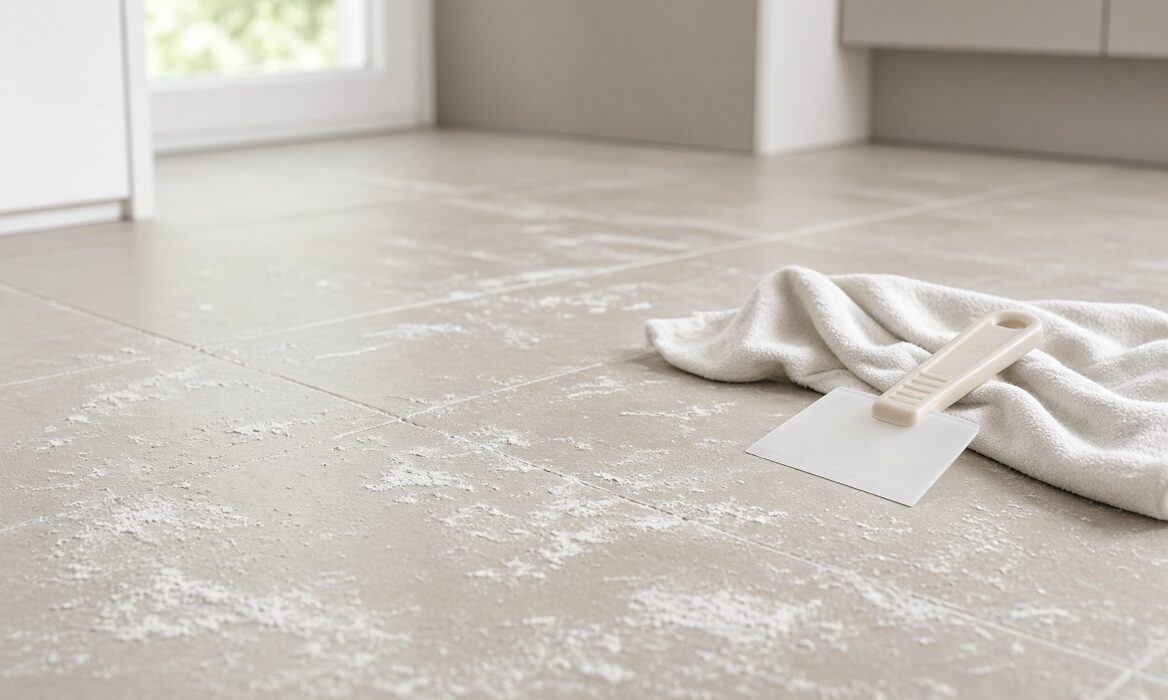
Dried cement haze appears as a cloudy or whitish film across the tile surface.
It commonly develops when excess cement or grout is not removed properly during installation.
The residue may become more noticeable when the tiles dry, particularly under natural light.
A suitable cement haze remover may be required for stubborn deposits, depending on the tile material and product instructions.
Hardened Cement Deposits
Thicker cement deposits can become difficult to remove once fully hardened.
These may appear as raised spots, rough patches or solid material attached to the surface.
Mechanical removal may sometimes be necessary, but it must be carried out carefully to avoid scratching or chipping the tiles.
2. Clean Fresh Cement Residue With Water
If cement residue is still fresh, start with the simplest cleaning method.
Clean water and a soft sponge can remove small amounts of cement before they harden.
Steps to Follow
- Remove loose cement particles from the tile surface.
- Dampen a clean sponge with fresh water.
- Gently wipe the affected area.
- Rinse the sponge frequently to prevent spreading cement.
- Use a clean, damp cloth to remove remaining material.
- Dry the surface with a soft microfiber cloth.
Avoid using excessive water because it can spread cement residue into grout joints and make cleaning more difficult.
It is also important not to scrub aggressively while the grout is still being established.
Always follow the installation product manufacturer’s recommended cleaning time.
3. Use a Soft Brush for Light Cement Deposits
When cement residue has partially dried, a soft brush may help remove loose material.
Choose a non-abrasive brush suitable for the tile finish.
Cleaning Process
- Remove loose dust and debris first.
- Lightly dampen the affected area if appropriate.
- Gently brush the cement deposits.
- Wipe away loosened material using a clean cloth.
- Rinse the surface carefully.
- Allow the tiles to dry and inspect the result.
Avoid metal brushes, steel wool and rough scouring pads.
These tools can scratch polished porcelain, ceramic glazes and other delicate tile finishes.
4. Apply a Suitable Cement Haze Remover
For stubborn cement haze, a specialist cement residue remover may be necessary.
These products are designed to break down certain cement-based deposits and make them easier to remove.
However, not every cement remover is suitable for every tile.
Some products contain acidic ingredients that can damage natural stone, cement-based surfaces and certain grout types.
How to Use a Cement Haze Remover
Before applying any cleaning product, read the manufacturer’s instructions carefully.
Follow these general precautions:
- Confirm that the product is suitable for your tile material.
- Check that the grout has cured sufficiently according to the product instructions.
- Test the cleaner on a small, inconspicuous area.
- Apply the recommended amount to the affected surface.
- Allow the product to work for the specified time.
- Gently agitate the residue using a suitable non-abrasive brush.
- Rinse thoroughly as directed by the manufacturer.
- Dry the surface and inspect for remaining marks.
Never allow a chemical cleaner to dry on the tiles unless the manufacturer specifically recommends it.
Important Consideration for Natural Stone
Natural stone tiles such as marble, limestone and travertine can be damaged by acidic cement removers.
Acidic cleaners may cause etching, dull patches or permanent surface damage.
For these materials, use a stone-safe cleaning product recommended by the tile supplier or a qualified cleaning professional.
5. Remove Hardened Cement Carefully
Thick, hardened cement deposits may require additional attention.
Trying to remove them with excessive force can damage the tile surface or chip the edges.
A plastic scraper may help lift small deposits from suitable surfaces without causing the same scratching risk associated with metal tools.
Safe Removal Steps
- Identify the tile material and surface finish.
- Remove loose particles using a soft brush.
- Check whether the cement deposit can be softened using a suitable product.
- Carefully lift loosened material with a plastic scraper.
- Clean the remaining residue using an approved tile cleaner.
- Rinse and dry the affected area.
Avoid using sharp metal blades unless the tile manufacturer confirms that the method is suitable.
For large or heavily hardened cement deposits, professional cleaning is often the safer option.
6. Choose the Right Cleaning Method for Your Tile Type
Different tile materials respond differently to cleaning products.
Selecting the correct cleaning method helps remove cement residue without damaging the finish.
| Tile Type | Recommended Cleaning Approach | Important Precaution |
|---|---|---|
| Ceramic tiles | Water, soft sponge and suitable cement haze remover | Protect the glazed surface |
| Porcelain tiles | Non-abrasive cleaning and compatible cement remover | Check the surface finish |
| Polished porcelain | Soft cloth and approved cleaner | Avoid abrasive tools |
| Marble tiles | Stone-safe, pH-neutral cleaner | Avoid acidic cleaners |
| Limestone tiles | Specialist natural stone cleaner | Avoid acids |
| Textured tiles | Soft nylon brush and suitable cleaner | Clean grooves carefully |
Always check the tile manufacturer’s cleaning recommendations before using chemical products.
7. Clean the Grout Joints Without Causing Damage
Grout joints can also collect cement residue during installation.
Cleaning them requires additional care because freshly installed grout may not have fully cured.
Aggressive brushing or strong chemicals can weaken or discolour grout.
Grout Cleaning Tips
- Use a soft nylon brush for suitable cured grout.
- Avoid excessive scrubbing.
- Do not apply strong chemicals without checking compatibility.
- Follow the grout manufacturer’s curing instructions.
- Rinse cleaning products thoroughly when required.
- Allow the grout to dry before evaluating its final colour.
If the grout remains stained after cleaning, the problem may be related to incorrect installation, uneven drying or product selection rather than surface residue alone.
8. Common Mistakes to Avoid When Removing Cement Residue
Cleaning newly installed tiles incorrectly can create additional problems.
Here are some common mistakes homeowners should avoid.
Using Strong Acids Without Checking Compatibility
Acidic cleaners can remove certain cement deposits, but they may also damage natural stone, grout and other sensitive surfaces.
Always check product compatibility before application.
Scrubbing With Steel Wool
Steel wool and metal scouring pads can leave scratches, particularly on polished or glazed tiles.
Use non-abrasive cleaning tools instead.
Cleaning Before the Grout Has Cured
Fresh grout needs sufficient time to cure.
Applying unsuitable cleaning chemicals too early can affect its strength, appearance and durability.
Follow the manufacturer’s instructions before starting deeper cleaning.
Using Dirty Water
Dirty cleaning water can spread cement particles across the floor instead of removing them.
Change the water regularly and rinse cleaning tools frequently.
Mixing Different Cleaning Chemicals
Combining cleaning chemicals can produce dangerous reactions.
Never mix cleaning products, particularly acidic cleaners with bleach or other chemical solutions.
Use one approved product at a time and follow its safety instructions.
Ignoring the Tile Manufacturer’s Recommendations
A cleaner that works well on ceramic tiles may damage marble or another natural stone.
Always identify the tile material before choosing a cleaning method.
9. How to Prevent Cement Residue During Tile Installation
Preventing cement residue is easier than removing hardened deposits later.
Proper installation practices can reduce cleaning time and help protect the finished tile surface.
Clean Excess Material During Installation
Remove excess adhesive and grout at the appropriate stage rather than allowing it to dry completely.
Follow the product manufacturer’s recommended cleaning procedure.
Use the Correct Amount of Grout
Applying excessive grout can increase the amount of material left on the tile surface.
Use the correct application technique and remove excess grout carefully.
Use Clean Sponges and Water
Dirty tools can spread cement residue across the tiled surface.
Clean sponges and fresh water help achieve a better finish.
Protect Newly Installed Tiles
During construction, protect finished tiled areas from dust, cement splashes and other building materials.
Suitable protective coverings can help prevent unnecessary cleaning problems.
Allow Proper Curing Time
Follow the recommended curing periods for adhesives and grout before performing deeper cleaning or exposing the installation to heavy use.
10. When Should You Hire a Professional Tile Cleaner?
Some cement residue problems can be resolved using simple cleaning methods. However, professional assistance may be necessary when the deposits are thick, widespread or difficult to remove.
Consider professional help when:
- Cement deposits have fully hardened.
- Large sections of flooring have cement haze.
- The tiles have a delicate or polished finish.
- Natural stone surfaces are affected.
- Previous cleaning attempts have left marks.
- Grout joints are becoming damaged.
- You are unsure which chemical cleaner is suitable.
A professional can assess the tile material, identify the type of residue and select an appropriate cleaning method.
This helps reduce the risk of permanent damage and improves the final appearance of the tiled surface.
Frequently Asked Questions
1. Can vinegar remove cement residue from tiles?
Vinegar is acidic and may react with certain cement-based deposits. However, it can damage natural stone, affect grout and create problems on sensitive surfaces. A tile-compatible cleaning product is generally a safer choice.
2. How long should I wait before removing cement haze?
The correct timing depends on the adhesive, grout and tile cleaning product being used. Fresh residue should be removed at the stage recommended by the manufacturer. Stronger cleaning treatments should only be used after the required curing period.
3. Can cement residue damage newly installed tiles?
Cement residue does not necessarily damage the tile itself, but hardened deposits can affect its appearance and become difficult to remove. Incorrect cleaning methods may cause scratches, etching or grout damage.
4. What is the difference between cement haze and grout haze?
Cement haze generally refers to a thin film left by cement-based materials. Grout haze is the cloudy residue remaining after grouting, commonly caused by excess grout material that was not removed properly.
5. Can I use a metal scraper to remove dried cement?
Metal scrapers can scratch or chip tile surfaces, particularly polished or glazed finishes. A suitable plastic scraper is generally a safer starting point, provided the tile manufacturer approves its use.
6. Is cement haze remover safe for porcelain tiles?
Some cement haze removers are suitable for porcelain tiles, but compatibility depends on the product and the tile finish. Always check the manufacturer’s instructions and test the product in a small hidden area.
7. Why do my newly installed tiles look cloudy after cleaning?
Cloudiness may be caused by remaining grout haze, cement residue, detergent buildup or minerals left behind by hard water. Identifying the source is important before choosing a cleaning solution.
8. How can I keep newly installed tiles clean?
Remove installation residue at the recommended time, use suitable cleaning products, avoid abrasive tools and clean the surface regularly with products recommended for the tile material.
Final Thoughts
Cement residue is a common problem after tile installation, but the right cleaning method can restore the appearance of newly installed tiles.
The most important step is identifying the tile material and the type of residue before choosing a cleaning product. Fresh cement deposits are usually easier to remove, while hardened cement haze may require specialist cleaning solutions.
Avoid harsh chemicals, abrasive tools and unnecessary scrubbing, particularly on delicate surfaces such as polished porcelain and natural stone.
Proper installation practices, timely cleaning and suitable maintenance can help keep tiled floors and walls looking their best.
If you are planning a new tiling project or need help with professional tiling and waterproofing, Aussie Tradies Group can help you explore suitable solutions for your property.
Contact Aussie Tradies Group today to discuss your tiling requirements and request a quote.