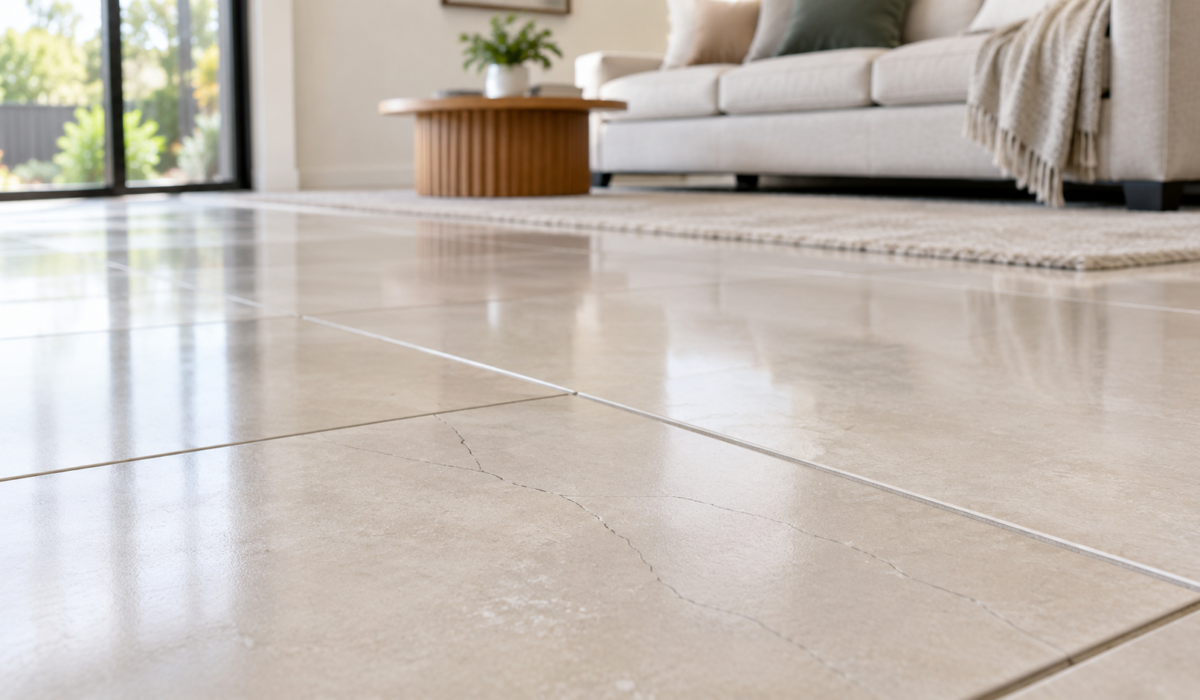
What Causes Hairline Cracks in Newly Installed Tiles?
Hairline cracks in newly installed tiles can develop because of substrate movement, poor adhesive application, inadequate surface preparation, incorrect installation techniques or natural building movement. Although tiles are designed to provide a durable flooring and wall covering, they can crack when the surface underneath them moves or when the installation does not provide sufficient support.
Finding small cracks in recently installed tiles can be frustrating, particularly when the flooring is expected to last for many years. Sometimes, the damage is limited to the tile surface. In other situations, a hairline crack indicates a deeper problem involving the concrete slab, screed, adhesive or underlying structure.
Understanding what causes hairline cracks in newly installed tiles is important because covering or replacing the damaged tile without fixing the original issue may result in repeated cracking.
In this guide, we explain the common reasons tiles crack shortly after installation, how to identify the warning signs, how to prevent tile damage and when professional tile repair may be necessary.
What Are Hairline Cracks in Tiles?
Hairline cracks are very thin fractures that appear on the surface of ceramic, porcelain or natural stone tiles. They may look like fine lines, small splits or narrow cracks running across the tile.
These cracks can appear shortly after installation or develop gradually over several weeks or months.
Depending on the cause, hairline cracks may affect:
- Individual floor tiles.
- Multiple neighbouring tiles.
- Wall tiles in bathrooms and kitchens.
- Grout joints between tiles.
- Tiles installed over concrete or timber substrates.
Not every hairline crack indicates a serious structural problem. However, cracks appearing in newly installed flooring should be investigated to determine whether they are caused by impact, material defects, installation problems or movement underneath the tiles.
8 Common Causes of Hairline Cracks in Newly Installed Tiles
Several factors can contribute to tile cracking after installation. Identifying the correct cause is essential for choosing an effective repair method.
1. Movement in the Concrete Subfloor
Movement in the underlying concrete is one of the most common reasons tiles develop cracks.
Concrete naturally changes dimensions as it cures and dries. During this process, shrinkage can create stress within the slab or screed.
When tiles are installed before the substrate has sufficiently cured or stabilised, movement underneath the flooring can transfer stress directly into the tiles.
This may result in:
- Fine cracks across individual tiles.
- Cracks following existing concrete joints.
- Cracked grout lines.
- Multiple tiles developing similar fractures.
- Repeated cracking after replacement.
A tile installation should account for substrate movement and existing construction joints. Depending on the conditions, appropriate movement joints or crack isolation systems may be required.
2. Poor Adhesive Application
Tile adhesive creates the bond between the tile and the underlying surface.
If adhesive is applied incorrectly, tiles may not receive sufficient support across their backs. Unsupported sections can experience additional stress when someone walks across the floor or places heavy furniture on it.
Common adhesive application problems include:
Insufficient adhesive coverage
When adhesive does not cover enough of the tile’s back, gaps may remain underneath the surface.
These unsupported areas can increase the risk of cracking under pressure.
Incorrect adhesive thickness
Applying adhesive too thickly or too thinly can affect the installation, particularly when the substrate is uneven.
Incorrect adhesive selection
Different tile materials and substrates require suitable adhesive products.
For example, porcelain tiles generally require an adhesive compatible with their low water absorption characteristics.
Exceeding adhesive open time
Tile adhesive has a limited working period after application. If the adhesive develops a surface skin before the tile is installed, proper bonding may not occur.
Following the manufacturer’s application instructions is essential for achieving reliable results.
3. Uneven or Poorly Prepared Subfloor
A stable and properly prepared substrate is essential for successful tile installation.
If the floor underneath the tiles is uneven, weak or contaminated, the finished surface may not receive adequate support.
Common preparation problems include:
- Dust and loose particles.
- Existing adhesive residue.
- Uneven concrete surfaces.
- Weak or deteriorating screed.
- Unrepaired cracks.
- Oil, paint or other contaminants.
When tiles are installed over an unsuitable surface, pressure may concentrate on specific areas rather than being distributed evenly.
This can lead to hairline fractures, broken tile corners or cracks that become more noticeable over time.
4. Missing or Incorrectly Installed Movement Joints
Tiles, concrete and other building materials expand and contract as temperatures and moisture conditions change.
Movement joints help accommodate these natural changes and reduce stress within tiled surfaces.
If movement joints are missing or incorrectly positioned, pressure can build up across the installation.
This is particularly important in:
- Large tiled rooms.
- Outdoor flooring.
- Areas exposed to direct sunlight.
- Long hallways.
- Commercial flooring.
- Areas where different building materials meet.
Rigid grout should not be used to bridge joints that are designed to accommodate movement.
Where movement joints are required, they should be installed according to the relevant specifications and manufacturer recommendations.
5. Installing Tiles Before the Subfloor Has Cured
New concrete and cement-based screeds need appropriate curing and drying time before tiles are installed.
If tiling begins too early, continued shrinkage and moisture changes in the substrate can place stress on the finished flooring.
This may lead to cracks appearing even when the tiles initially look perfectly installed.
The required waiting period depends on several factors, including:
- Substrate thickness.
- Concrete or screed composition.
- Environmental temperature.
- Humidity and ventilation.
- Moisture conditions.
- Product specifications.
Installers should check that the substrate is sufficiently stable and meets the adhesive and tile manufacturer’s requirements before installation.
6. Heavy Loads or Impact During Early Installation
Newly installed tiles need sufficient time for the adhesive and grout to develop their intended strength.
Walking on the floor too early, moving heavy furniture or placing equipment on the surface before the recommended curing period can damage the installation.
Heavy impacts can also create localised fractures.
For example, dropping a heavy object onto a newly tiled floor may cause a visible crack even if the surrounding installation is correctly bonded.
To reduce this risk, restrict access during installation and follow the manufacturer’s recommended curing times before allowing normal foot traffic.
7. Structural Movement or Floor Deflection
Buildings naturally experience some movement. However, excessive movement in the underlying structure can cause problems with rigid tile finishes.
Floor deflection occurs when a floor structure bends under loading.
If a timber floor, joist system or concrete substrate moves beyond what the tile installation can accommodate, the resulting stress may cause tiles or grout to crack.
Other potential sources include:
- Building settlement.
- Movement between structural materials.
- Inadequately supported flooring.
- Vibration from nearby equipment.
- Changes in structural loading.
If cracks repeatedly appear in the same location, the underlying structure should be assessed before replacement tiles are installed.
8. Defective Tiles or Manufacturing Problems
Sometimes, the problem originates in the tile itself.
Manufacturing defects, internal weaknesses, inconsistent thickness or damage during transportation can affect tile durability.
Glazed ceramic tiles may also develop a condition known as crazing.
Crazing refers to a network of very fine cracks within the glaze rather than a fracture passing through the entire tile body.
It can become visible after installation due to interactions between the tile body, glaze and installation environment.
If several tiles from the same batch develop similar surface patterns, ask the supplier to inspect the product and review the manufacturer’s technical information.
How to Identify the Cause of Hairline Cracks in Tiles
The location, pattern and appearance of a crack can provide useful clues about its possible cause.
However, visual inspection alone cannot confirm every installation defect.
Cracks Across the Middle of a Tile
A crack running across the middle of a tile may indicate:
- Impact damage.
- Unsupported areas beneath the tile.
- Substrate movement.
- Excessive floor deflection.
If the crack follows a line across multiple tiles, movement in the underlying substrate should be investigated.
Cracks Along Tile Edges
Cracks near tile edges or corners may be associated with poor support, installation pressure or impact.
Insufficient adhesive coverage near the edges can leave sections vulnerable to damage.
Cracks Following Grout Lines
When cracks repeatedly follow grout lines, the problem may involve movement within the tiled surface or the underlying substrate.
Damaged grout should not simply be covered without checking whether the joint is experiencing ongoing movement.
Multiple Tiles Cracking in the Same Area
If several neighbouring tiles develop cracks, the problem may extend beyond an individual defective tile.
Possible causes include:
- Subfloor movement.
- Concrete shrinkage.
- Missing movement joints.
- Structural deflection.
- Installation over an existing substrate crack.
A wider inspection is recommended before carrying out repairs.
Fine Network of Cracks on the Tile Surface
A network of very fine lines across a glazed surface may indicate tile crazing rather than a structural fracture.
The distinction is important because crazing and full-depth tile cracking have different causes and repair considerations.
How to Prevent Hairline Cracks in Newly Installed Tiles
Preventing tile cracks starts before the first tile is installed.
Proper substrate preparation, suitable materials and correct installation practices all contribute to a durable tiled surface.
1. Prepare the Subfloor Properly
Before tiling, ensure the substrate is clean, stable, sufficiently dry and suitable for the selected installation system.
Remove dust, loose material, grease and existing contaminants.
Repair unsuitable areas and address existing cracks before proceeding.
2. Allow Concrete to Cure
Do not rush the installation process.
Allow concrete and cement-based screeds to reach the required curing and moisture conditions before installing tiles.
Follow the product manufacturer’s technical recommendations.
3. Use Suitable Tile Adhesive
Choose adhesive that is compatible with the tile material, substrate and installation environment.
Porcelain, ceramic and natural stone tiles may have different requirements.
Correct adhesive selection helps improve bonding performance and long-term durability.
4. Ensure Adequate Adhesive Coverage
Apply adhesive using the recommended trowel and installation technique.
For larger tiles, appropriate back-buttering may be necessary to achieve the required adhesive coverage.
Avoid leaving large unsupported areas underneath the tiles.
5. Install Movement Joints Where Required
Movement joints should be included according to the project specifications and expected environmental conditions.
Pay particular attention to large tiled areas, external flooring and locations exposed to temperature changes.
6. Use Crack Isolation Systems When Appropriate
Where existing substrate cracks are identified, an appropriate crack isolation membrane may help reduce the transfer of certain movements into the tile layer.
However, these products are not a substitute for repairing structural defects or accommodating active movement and construction joints.
The correct system should be selected according to the substrate condition and manufacturer’s instructions.
7. Protect Newly Installed Tiles
Keep unnecessary foot traffic and heavy loads away from newly installed flooring until the adhesive and grout have cured sufficiently.
Protect the surface during other construction activities to prevent accidental impacts and damage.
8. Choose Quality Tiles From Reliable Suppliers
Purchase tiles from reputable suppliers and check their specifications before installation.
Inspect products for visible damage, inconsistent dimensions and manufacturing defects.
Keep batch information and purchase records in case a product issue needs to be investigated.
How to Repair Hairline Cracks in Newly Installed Tiles
The correct repair method depends on the type of crack, the condition of the tile and whether the underlying cause has been identified.
Simply filling a crack may improve its appearance, but it will not necessarily restore the tile’s strength.
Step 1: Inspect the Cracked Tile
Examine the affected tile and surrounding grout lines.
Check whether the crack is isolated or extends across several tiles.
Look for additional symptoms such as hollow sounds, loose edges, uneven flooring or moisture.
Step 2: Identify the Underlying Problem
Determine whether the crack is caused by impact, adhesive failure, substrate movement or a tile defect.
If the crack follows an existing concrete joint or appears across multiple tiles, further investigation may be necessary.
Step 3: Remove the Damaged Tile if Necessary
A severely cracked tile may need to be removed and replaced.
The removal process should be carried out carefully to avoid damaging neighbouring tiles or the underlying substrate.
Step 4: Inspect and Repair the Substrate
Once the damaged tile is removed, inspect the adhesive and exposed substrate.
Check for cracks, loose material, moisture and insufficient adhesive coverage.
Carry out any necessary repairs before installing a replacement tile.
Step 5: Install the Replacement Tile
Use a suitable replacement tile and compatible adhesive.
Ensure the substrate is properly prepared and the adhesive provides the required coverage.
Maintain appropriate joint spacing and movement provisions.
Step 6: Allow Sufficient Curing Time
Allow the adhesive and grout to cure according to the manufacturer’s instructions.
Avoid heavy foot traffic and loading the repaired area prematurely.
Can You Fix Hairline Cracks Without Replacing Tiles?
In some situations, a minor surface defect may be treated without replacing the entire tile.
However, the correct approach depends on the type of damage.
A surface-level glaze defect may need a different treatment from a crack extending through the tile body.
Similarly, a crack caused by substrate movement will generally require more than a cosmetic repair.
If the tile is structurally cracked, replacement is often the more reliable option.
Before applying repair products, confirm that they are suitable for the tile material and that the underlying cause has been addressed.
When Should You Call a Professional Tiler?
Professional inspection is recommended when hairline cracks appear shortly after installation, especially if several tiles are affected.
An experienced tiler can examine the flooring system and help identify whether the issue relates to installation quality, substrate movement or material defects.
Consider professional assistance when:
- Multiple tiles have developed cracks.
- Cracks continue appearing after repairs.
- Tiles sound hollow around damaged areas.
- Grout lines repeatedly crack.
- Tiles are becoming loose or raised.
- Moisture or water damage is suspected.
- Cracks follow a visible line across the floor.
If cracking is accompanied by wider building cracks, noticeable floor movement or signs of structural settlement, an appropriate building professional should also assess the underlying issue.
Frequently Asked Questions About Hairline Cracks in Tiles
Why are my new tiles cracking after installation?
New tiles may crack because of substrate movement, insufficient adhesive coverage, poor surface preparation, missing movement joints, early foot traffic or impact damage. The underlying cause should be identified before replacing the damaged tiles.
Are hairline cracks in new tiles normal?
Hairline cracks are not something to ignore in a newly installed tile surface. Some fine glaze cracks may be related to crazing, but fractures through the tile body can indicate installation or material problems.
Can concrete shrinkage cause new tiles to crack?
Yes. Concrete shrinkage can create movement and stress beneath the tiled surface. If the installation does not properly accommodate this movement, cracks may develop in tiles or grout.
Can poor tile adhesive cause cracking?
Yes. Insufficient adhesive coverage, unsuitable adhesive or incorrect application can leave unsupported areas beneath tiles. These areas may be more vulnerable to pressure and impact.
Why do tiles crack in a straight line?
A straight crack running across several tiles may indicate an underlying substrate crack, construction joint or movement within the floor. The crack pattern should be inspected to identify the source.
Can cracked tiles be repaired without replacing the whole floor?
Yes. If the damage is limited to a few tiles and the surrounding installation is stable, individual tiles may be replaced. Widespread cracking may require more extensive repairs.
Does a hollow sound mean my new tile will crack?
Not necessarily. Some hollow sounds can occur without immediate tile failure. However, hollow areas combined with movement, cracked grout or loose tiles should be investigated.
How long should I wait before walking on newly installed tiles?
The waiting period depends on the adhesive, grout, installation conditions and manufacturer’s instructions. Follow the specified curing times rather than assuming that all tile installations are ready after the same number of hours.
Can temperature changes cause hairline cracks in tiles?
Yes. Tiles and substrates respond differently to temperature changes. Without appropriate movement joints, expansion and contraction can create stress that may contribute to cracking.
Final Thoughts
Hairline cracks in newly installed tiles can result from several problems, including concrete shrinkage, substrate movement, poor adhesive application, inadequate surface preparation and missing movement joints.
Although some cracks may be caused by isolated impact or surface defects, repeated cracking can indicate a more significant installation issue.
The best way to prevent tile damage is to prepare the substrate correctly, use suitable adhesive, allow sufficient curing time and accommodate natural building movement.
If your newly installed floor or wall tiles are developing cracks, identify the underlying cause before carrying out cosmetic repairs or replacing individual tiles.
For professional tiling advice and assistance with your project, contact Aussie Tradies Group.
Explore Aussie Tradies Group to learn more about our tiling and waterproofing services.