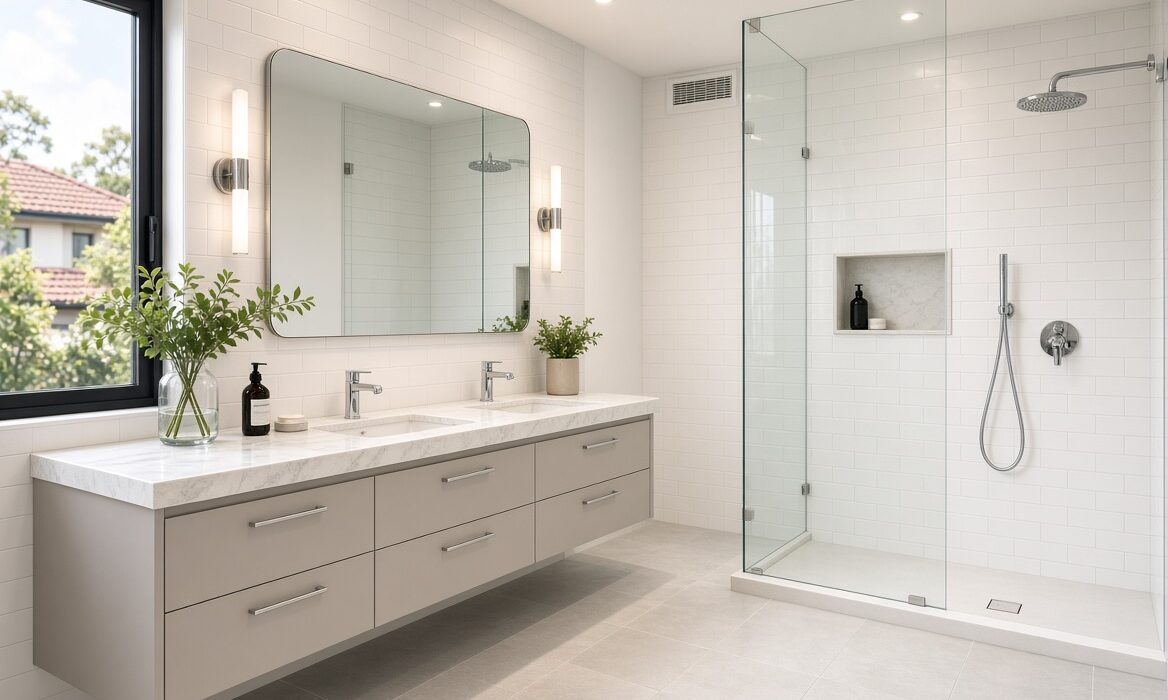
Bathroom Renovation Checklist for Melbourne Homeowners
A bathroom renovation can improve comfort, functionality, appearance, and the overall value of your Melbourne home. However, a successful renovation requires more than choosing attractive tiles and bathroom fittings. You need to plan the layout, plumbing, waterproofing, ventilation, lighting, storage, flooring, wall finishes, and final installation in the right order. This bathroom renovation Melbourne checklist will help homeowners understand what to consider before and during a bathroom renovation so the project is properly planned from start to finish.
Why a Bathroom Renovation Needs Careful Planning
Bathrooms are exposed to water, moisture, humidity, cleaning products, and regular daily use. Poor planning can result in problems such as water leaks, damaged grout, poor drainage, mould, cracked tiles, inadequate ventilation, and expensive repairs.
A renovation also involves several trades and stages that need to work together. Plumbing may need to be completed before walls are closed, waterproofing needs to be properly prepared before tiling, and tile layouts should be considered before fixtures are permanently installed.
Planning everything beforehand can help you avoid unnecessary changes and make better decisions about your budget and materials.
Bathroom Renovation Checklist for Melbourne Homes
Before starting your renovation, work through the following checklist:
• Define your renovation goals
• Set a realistic budget
• Measure the existing bathroom
• Plan the bathroom layout
• Check plumbing requirements
• Consider electrical work
• Plan ventilation
• Select suitable bathroom tiles
• Prepare the surfaces
• Complete waterproofing correctly
• Plan tile layouts and patterns
• Select fixtures and fittings
• Consider storage
• Choose suitable flooring
• Check lighting requirements
• Plan for drainage and floor falls
• Confirm installation details
• Allow time for curing and drying
• Complete final inspections
• Keep maintenance requirements in mind
Each stage can affect the next, so it is important not to treat the renovation as a collection of separate decisions.
1. Decide What You Want to Achieve
Start by identifying the main reason for renovating your bathroom.
You may want to update an outdated bathroom, improve storage, create a more modern appearance, repair water damage, improve accessibility, or make better use of a small space.
Some homeowners only need new tiles and fittings, while others require a complete bathroom renovation involving plumbing, waterproofing, flooring, walls, lighting, and fixtures.
Write down your priorities before selecting materials.
For example:
• Improve shower space
• Replace damaged tiles
• Upgrade waterproofing
• Add better storage
• Improve lighting
• Create easier access
• Replace outdated fittings
• Improve bathroom ventilation
Knowing your priorities makes it easier to decide where your renovation budget should go.
2. Set a Realistic Bathroom Renovation Budget
Your budget should include more than the visible materials.
A bathroom renovation may involve:
• Demolition
• Waste removal
• Plumbing
• Electrical work
• Waterproofing
• Surface preparation
• Tiling
• Grouting
• Fixtures
• Shower screens
• Vanity installation
• Toilet installation
• Lighting
• Ventilation
• Painting
• Labour
• Finishing work
It is also sensible to allow some room in your budget for unexpected issues.
Older Melbourne homes can sometimes have hidden problems behind walls or beneath existing floors. Once demolition begins, previously concealed plumbing, damaged surfaces, moisture issues, or other structural concerns may become visible.
A contingency budget can help you deal with these issues without significantly disrupting the project.
3. Measure Your Existing Bathroom
Accurate measurements are essential before choosing fixtures, tiles, vanities, showers, and other products.
Measure:
• Wall lengths
• Ceiling height
• Floor dimensions
• Door openings
• Window locations
• Existing shower area
• Vanity space
• Toilet position
• Plumbing points
• Drain locations
Do not assume that a product will fit simply because it looks suitable online or in a showroom.
Even a small difference in measurements can affect the final layout.
4. Plan the Bathroom Layout
The layout affects how comfortable and practical your bathroom will be.
Consider where the following will be positioned:
• Shower
• Toilet
• Vanity
• Bath
• Storage
• Towel rails
• Mirrors
• Doors
• Windows
• Floor waste
If you are changing the location of major fixtures, additional plumbing work may be required.
A well planned layout should provide enough movement around fixtures while making practical use of the available space.
Think About Door Clearance
Bathroom doors need enough clearance to open comfortably without hitting the vanity, toilet, shower screen, or other fixtures.
In smaller bathrooms, changing the direction of a door or considering a different door configuration may improve usable space.
Consider Future Use
A bathroom should not only work for your current needs.
Think about how the space may be used several years from now. Accessibility, storage, shower entry, lighting, and fixture placement can all affect long term usability.
5. Check Your Plumbing Requirements
Plumbing is one of the most important parts of a bathroom renovation.
Before finalising your layout, determine whether existing plumbing can remain in its current position or whether pipes need to be relocated.
Moving plumbing can increase the cost and complexity of a renovation.
If the existing plumbing is old or damaged, replacing sections during renovation may also make sense while the walls and floors are already accessible.
Professional assessment is particularly important when renovating an older property.
6. Plan Electrical Work Before Finishing the Walls
Electrical requirements should be considered early rather than after the renovation is already underway.
Think about:
• Ceiling lights
• Mirror lighting
• Exhaust fans
• Power outlets
• Heated towel rails
• Underfloor heating
• Other bathroom electrical requirements
Bathroom electrical work must be completed safely and according to applicable requirements.
Planning electrical positions before tiling and final finishes helps prevent unnecessary changes later.
7. Improve Bathroom Ventilation
Good ventilation is essential in a bathroom because showers and baths create moisture and humidity.
Without adequate ventilation, moisture can contribute to:
• Mould growth
• Damp surfaces
• Peeling paint
• Damaged grout
• Unpleasant odours
• Long term moisture problems
An effective exhaust fan can help remove humid air and reduce condensation.
Ventilation is particularly important in bathrooms with limited windows or restricted natural airflow.
8. Choose the Right Bathroom Tiles
Tiles have a major influence on both the appearance and performance of your bathroom.
When choosing bathroom tiles, consider:
• Water exposure
• Slip resistance
• Surface texture
• Tile size
• Maintenance
• Cleaning requirements
• Colour
• Pattern
• Durability
• Compatibility with the installation area
Do not choose tiles based only on appearance.
A tile that looks attractive on a showroom wall may not necessarily be the best option for a wet floor.
Floor Tiles
Bathroom floor tiles should provide suitable traction and be appropriate for wet conditions.
Smaller tiles can also be useful in some shower areas because additional grout joints can make it easier to create the required floor falls.
Wall Tiles
Wall tiles provide more flexibility in terms of size, colour, texture, and design.
Large format tiles can create a clean contemporary appearance, while smaller tiles can add pattern and visual detail.
The best option depends on the size, layout, design, and practical requirements of the bathroom.
9. Prepare the Surface Before Tiling
One of the most important parts of a quality bathroom renovation is proper surface preparation.
Tiles should not simply be installed over an unsuitable surface because the finished appearance may look acceptable initially.
Poor preparation can contribute to:
• Uneven tiles
• Cracked tiles
• Loose tiles
• Poor adhesive bonding
• Grout cracking
• Water related problems
The substrate should be suitable, clean, stable, and properly prepared before tiling begins.
10. Do Not Treat Tiling as Waterproofing
This is one of the most important points on any bathroom renovation checklist.
Tiles and grout do not replace a properly designed waterproofing system.
Waterproofing is required in appropriate wet areas to help prevent moisture from reaching underlying building materials.
A bathroom can have expensive tiles and still experience water damage if waterproofing has not been properly planned and installed.
The waterproofing stage should therefore be completed correctly before tiling begins.
11. Plan Waterproofing Carefully
Waterproofing needs to cover the appropriate areas and connect correctly around penetrations, corners, joints, fixtures, and wet areas.
Particular attention is needed around:
• Shower floors
• Shower walls
• Floor junctions
• Wall junctions
• Plumbing penetrations
• Floor wastes
• Shower niches
• Other areas exposed to regular water
Waterproofing should never be treated as a minor finishing step.
It is part of the protection system that sits behind the visible bathroom finishes.
12. Plan the Tile Layout Before Installation
Do not wait until the day of installation to decide where your tiles will go.
A tile layout should be considered in advance.
The layout affects:
• Where cuts appear
• Symmetry
• Feature areas
• Grout lines
• Shower niches
• Floor waste positioning
• Wall transitions
• Overall visual balance
A good layout can make a bathroom look more intentional and professionally finished.
Avoid Small Awkward Cuts
Small slivers of tile around corners or fixtures can make a finished wall look unbalanced.
Planning the starting point and tile layout can help distribute cuts more evenly.
This is especially important around:
• Vanities
• Niches
• Shower screens
• Windows
• Door openings
• Feature walls
13. Think About Tile Size
Tile size can change how spacious a bathroom feels.
Large format tiles may reduce the number of grout lines and create a clean appearance. However, they require appropriate surface preparation and careful installation.
Smaller tiles can work well in compact areas and may provide greater flexibility around floor falls and complex layouts.
The best tile size depends on the individual bathroom rather than a general design trend.
14. Choose Grout Carefully
Grout contributes to both appearance and maintenance.
When selecting grout, consider:
• Colour
• Tile type
• Joint width
• Cleaning requirements
• Moisture exposure
• Overall bathroom design
A grout colour that closely complements the tile can create a more seamless appearance, while contrasting grout can make the tile pattern more prominent.
Grout also needs proper installation and curing.
15. Use Flexible Sealant in the Right Places
Not every joint should be filled with standard grout.
Changes of plane, such as where a wall meets another wall or floor, may require an appropriate flexible sealant rather than rigid grout.
These areas can experience movement, and the correct flexible treatment can help reduce cracking.
The exact installation method should be based on the bathroom construction and applicable requirements.
16. Choose Bathroom Fixtures Carefully
Fixtures should match the available space and the way the bathroom will be used.
Consider:
• Vanity size
• Basin type
• Toilet design
• Shower configuration
• Bath size
• Tapware
• Shower fittings
• Shower screen
• Mirror
• Storage
Do not choose fixtures individually without considering how they will work together.
A large vanity may look attractive but can make a small bathroom feel cramped.
Similarly, a large shower may reduce useful storage or movement space.
17. Plan Storage From the Beginning
Storage is often overlooked during bathroom renovations.
Think about where you will keep:
• Towels
• Toiletries
• Cleaning products
• Hair products
• Toilet paper
• Everyday bathroom items
Built in niches can provide useful shower storage without taking up floor space.
Vanities with drawers can also provide more accessible storage than traditional cupboard designs.
18. Consider Shower Niches
A shower niche can provide a practical storage solution while contributing to the overall design.
However, niches require careful planning.
The position should work with:
• Tile dimensions
• Plumbing
• Shower fittings
• Waterproofing
• Shelf height
• Grout lines
A niche should be incorporated into the waterproofing and tiling plan rather than added as an afterthought.
19. Plan Bathroom Floor Falls and Drainage
Water needs to flow toward the appropriate floor waste rather than remain standing on the floor.
The floor needs to be planned with suitable falls, particularly within shower areas.
Poor drainage can result in:
• Standing water
• Increased moisture
• Cleaning difficulties
• Grout deterioration
• Water escaping into unwanted areas
Drainage should be considered during the floor preparation and waterproofing stages.
20. Think About Bathroom Lighting
Good lighting can improve both functionality and appearance.
Consider using a combination of general and task lighting where appropriate.
Mirror lighting is particularly useful for:
• Shaving
• Applying makeup
• Grooming
• General personal care
Natural light can also influence the choice of colours and finishes.
A darker bathroom may benefit from lighter surfaces and carefully planned lighting to make the space feel brighter.
21. Choose Materials Suitable for Melbourne Conditions
Melbourne homes can vary significantly in age, construction style, layout, and existing bathroom condition.
A bathroom renovation in an older home may involve different preparation requirements from a renovation in a newer apartment or townhouse.
Before selecting materials, consider the existing structure and how the bathroom is constructed.
Material selection should be based on performance as well as appearance.
22. Be Careful When Renovating Older Bathrooms
Older bathrooms can contain hidden issues that are not obvious before demolition.
Possible concerns include:
• Deteriorated substrates
• Old plumbing
• Previous water damage
• Uneven surfaces
• Poor previous waterproofing
• Outdated electrical systems
• Moisture behind walls
This does not mean every older bathroom has problems.
It simply means homeowners should be prepared for the possibility of additional work once existing finishes are removed.
23. Do Not Rush the Waterproofing or Tiling Process
Bathroom renovations involve several stages that need sufficient time.
Rushing one stage can affect the next.
For example, waterproofing needs appropriate preparation and curing before tiling proceeds. Adhesives and grout also require suitable curing conditions.
Trying to finish the bathroom too quickly can compromise the quality of the installation.
A proper renovation schedule should allow each stage to be completed correctly.
24. Check Tile Quantities Before Ordering
Always account for cuts, breakages, future repairs, and potential batch differences when ordering tiles.
Running short during installation can create unnecessary delays.
If the exact tile is no longer available later, replacing a damaged tile may become difficult.
Keeping a small quantity of spare tiles can therefore be useful for future maintenance.
25. Think About Maintenance
A beautiful bathroom should also be practical to maintain.
Before choosing finishes, ask:
• Will the surface be easy to clean?
• Does the tile show water marks easily?
• Will the grout require frequent cleaning?
• Is the shower screen easy to access?
• Does the vanity provide enough storage?
• Is there adequate ventilation?
• Are there difficult corners that will collect dirt?
Good design should combine appearance with everyday practicality.
26. Check the Shower Screen Design
The shower screen can have a noticeable effect on the appearance and functionality of the bathroom.
Consider:
• Screen size
• Door opening
• Glass configuration
• Hardware
• Cleaning access
• Shower position
The screen should work with the tile layout, shower floor, drainage, and overall bathroom design.
27. Consider Accessibility
Accessibility is worth considering even if you do not currently need specific accessibility features.
A bathroom with comfortable circulation, sensible fixture placement, good lighting, and practical shower access can be easier to use as your needs change.
If accessibility is a priority, discuss it early so the layout can accommodate the required features.
28. Confirm the Work Sequence
A typical bathroom renovation may involve several stages.
The exact sequence depends on the project, but commonly includes:
- Planning and measurements
- Demolition
- Plumbing and electrical preparation
- Surface preparation
- Waterproofing
- Tiling
- Grouting and sealing
- Fixture installation
- Shower screen and finishing work
- Final inspection and cleaning
The important point is that these stages need to be coordinated.
Waterproofing should not be skipped, and tiling should not begin before the relevant surfaces are properly prepared.
29. Create a Final Inspection Checklist
Before considering the renovation complete, inspect the bathroom carefully.
Check:
• Tiles are properly aligned
• Grout joints are consistent
• No tiles are visibly damaged
• Silicone joints are neat
• Fixtures are secure
• Doors open correctly
• Shower screen operates properly
• Water drains correctly
• Vanity doors and drawers operate correctly
• Exhaust fan works properly
• Lights and electrical fittings function correctly
• There are no obvious signs of water leakage
A final inspection gives you an opportunity to identify small issues before the project is fully closed out.
Common Bathroom Renovation Mistakes to Avoid
Even with a detailed checklist, homeowners can make mistakes during planning.
Choosing Materials Only for Appearance
A tile may look excellent but may not be suitable for the intended application.
Always consider performance, maintenance, water exposure, and installation requirements.
Ignoring Waterproofing
Waterproofing should be treated as a fundamental part of bathroom construction rather than an optional extra.
Poor Layout Planning
Moving fixtures after installation can be expensive and disruptive.
Plan the layout before work begins.
Selecting Fixtures Too Late
Vanities, toilets, shower screens, and other fixtures can influence measurements and installation requirements.
Select important fixtures early enough for the renovation team to plan around them.
Rushing the Installation
Trying to complete the bathroom as quickly as possible can create avoidable quality problems.
Give each stage enough time.
Forgetting Ventilation
A beautiful bathroom can still develop moisture problems if humidity is not properly controlled.
When Should You Hire Professional Bathroom Renovation Services?
A bathroom renovation can involve multiple technical areas, including plumbing, electrical work, waterproofing, surface preparation, tiling, drainage, and fixture installation.
Professional help can be particularly valuable when:
• The layout is changing
• Plumbing needs to be relocated
• Existing tiles need to be removed
• There are signs of water damage
• Waterproofing needs to be replaced
• The floor requires correction
• Large format tiles are being installed
• A complete bathroom renovation is planned
Professional bathroom renovation and tiling services can help coordinate these stages and reduce the risk of problems caused by poor preparation or incompatible work.
Bathroom Renovation Checklist Before You Start
Use this quick checklist before beginning your project:
Planning
• Define your renovation goals
• Measure the bathroom
• Decide whether the layout will change
• Set your budget
• Allow for unexpected costs
Plumbing and Electrical
• Check existing plumbing
• Plan fixture locations
• Plan electrical requirements
• Consider ventilation
Waterproofing
• Identify wet areas
• Prepare surfaces
• Plan floor falls
• Check floor waste locations
• Complete waterproofing correctly
Tiling
• Select suitable floor tiles
• Select suitable wall tiles
• Confirm tile quantities
• Plan tile layouts
• Choose grout
• Plan flexible sealant joints
Fixtures
• Select vanity
• Select toilet
• Select shower
• Select bath if required
• Select tapware
• Select mirror
• Select shower screen
Final Stage
• Check tile alignment
• Check grout
• Check silicone
• Test drainage
• Check fixtures
• Test ventilation
• Inspect the completed bathroom
Frequently Asked Questions
How much does a bathroom renovation cost in Melbourne?
The cost depends on the bathroom size, existing condition, layout changes, materials, plumbing, electrical requirements, waterproofing, tiling, fixtures, and labour. A simple cosmetic renovation will generally have different costs from a complete bathroom renovation involving structural or plumbing changes.
How long does a bathroom renovation take?
The timeframe depends on the size and complexity of the project. Demolition, plumbing, electrical work, surface preparation, waterproofing, tiling, curing times, fixture installation, and finishing all need to be considered when planning the schedule.
Do I need waterproofing when replacing bathroom tiles?
If the existing waterproofing is inadequate, damaged, or being disturbed as part of the renovation, it may need to be addressed. Tiles themselves should not be treated as the waterproofing system.
What tiles are best for a Melbourne bathroom?
There is no single tile that is best for every bathroom. Porcelain, ceramic, and other suitable tile options can work depending on where they are installed. The tile should be appropriate for the application, moisture exposure, slip requirements, design, and maintenance needs.
Should I change the bathroom layout?
Not always. Keeping plumbing and fixture locations in the same positions can sometimes simplify a renovation. However, changing the layout may be worthwhile if the existing bathroom has poor circulation, inadequate storage, or an inefficient arrangement.
Is professional tiling worth it for a bathroom renovation?
Professional tiling can help ensure that surfaces are properly prepared, tile layouts are planned correctly, tiles are installed accurately, and finishing details are handled properly. This is particularly important in wet areas where waterproofing and drainage also need careful attention.
What should I renovate first in a bathroom?
Start with planning and measurements. Once the layout and requirements are confirmed, the renovation can progress through demolition, plumbing and electrical preparation, surface preparation, waterproofing, tiling, fixture installation, and final finishing.
Final Thoughts
A successful bathroom renovation starts long before the first tile is installed. Careful planning of the layout, plumbing, ventilation, waterproofing, drainage, tiles, fixtures, lighting, storage, and finishing details can make the renovation more practical and help prevent expensive problems later.
For Melbourne homeowners, the condition and construction of the existing bathroom should also be considered before work begins. Older properties, apartments, townhouses, and modern homes can all have different renovation requirements.
If you are planning a bathroom renovation in Melbourne, use this checklist as a starting point and make sure every important stage is considered before installation begins.
Ready to plan your bathroom renovation? Get Free Strategy Session.